Dark Field
Parts
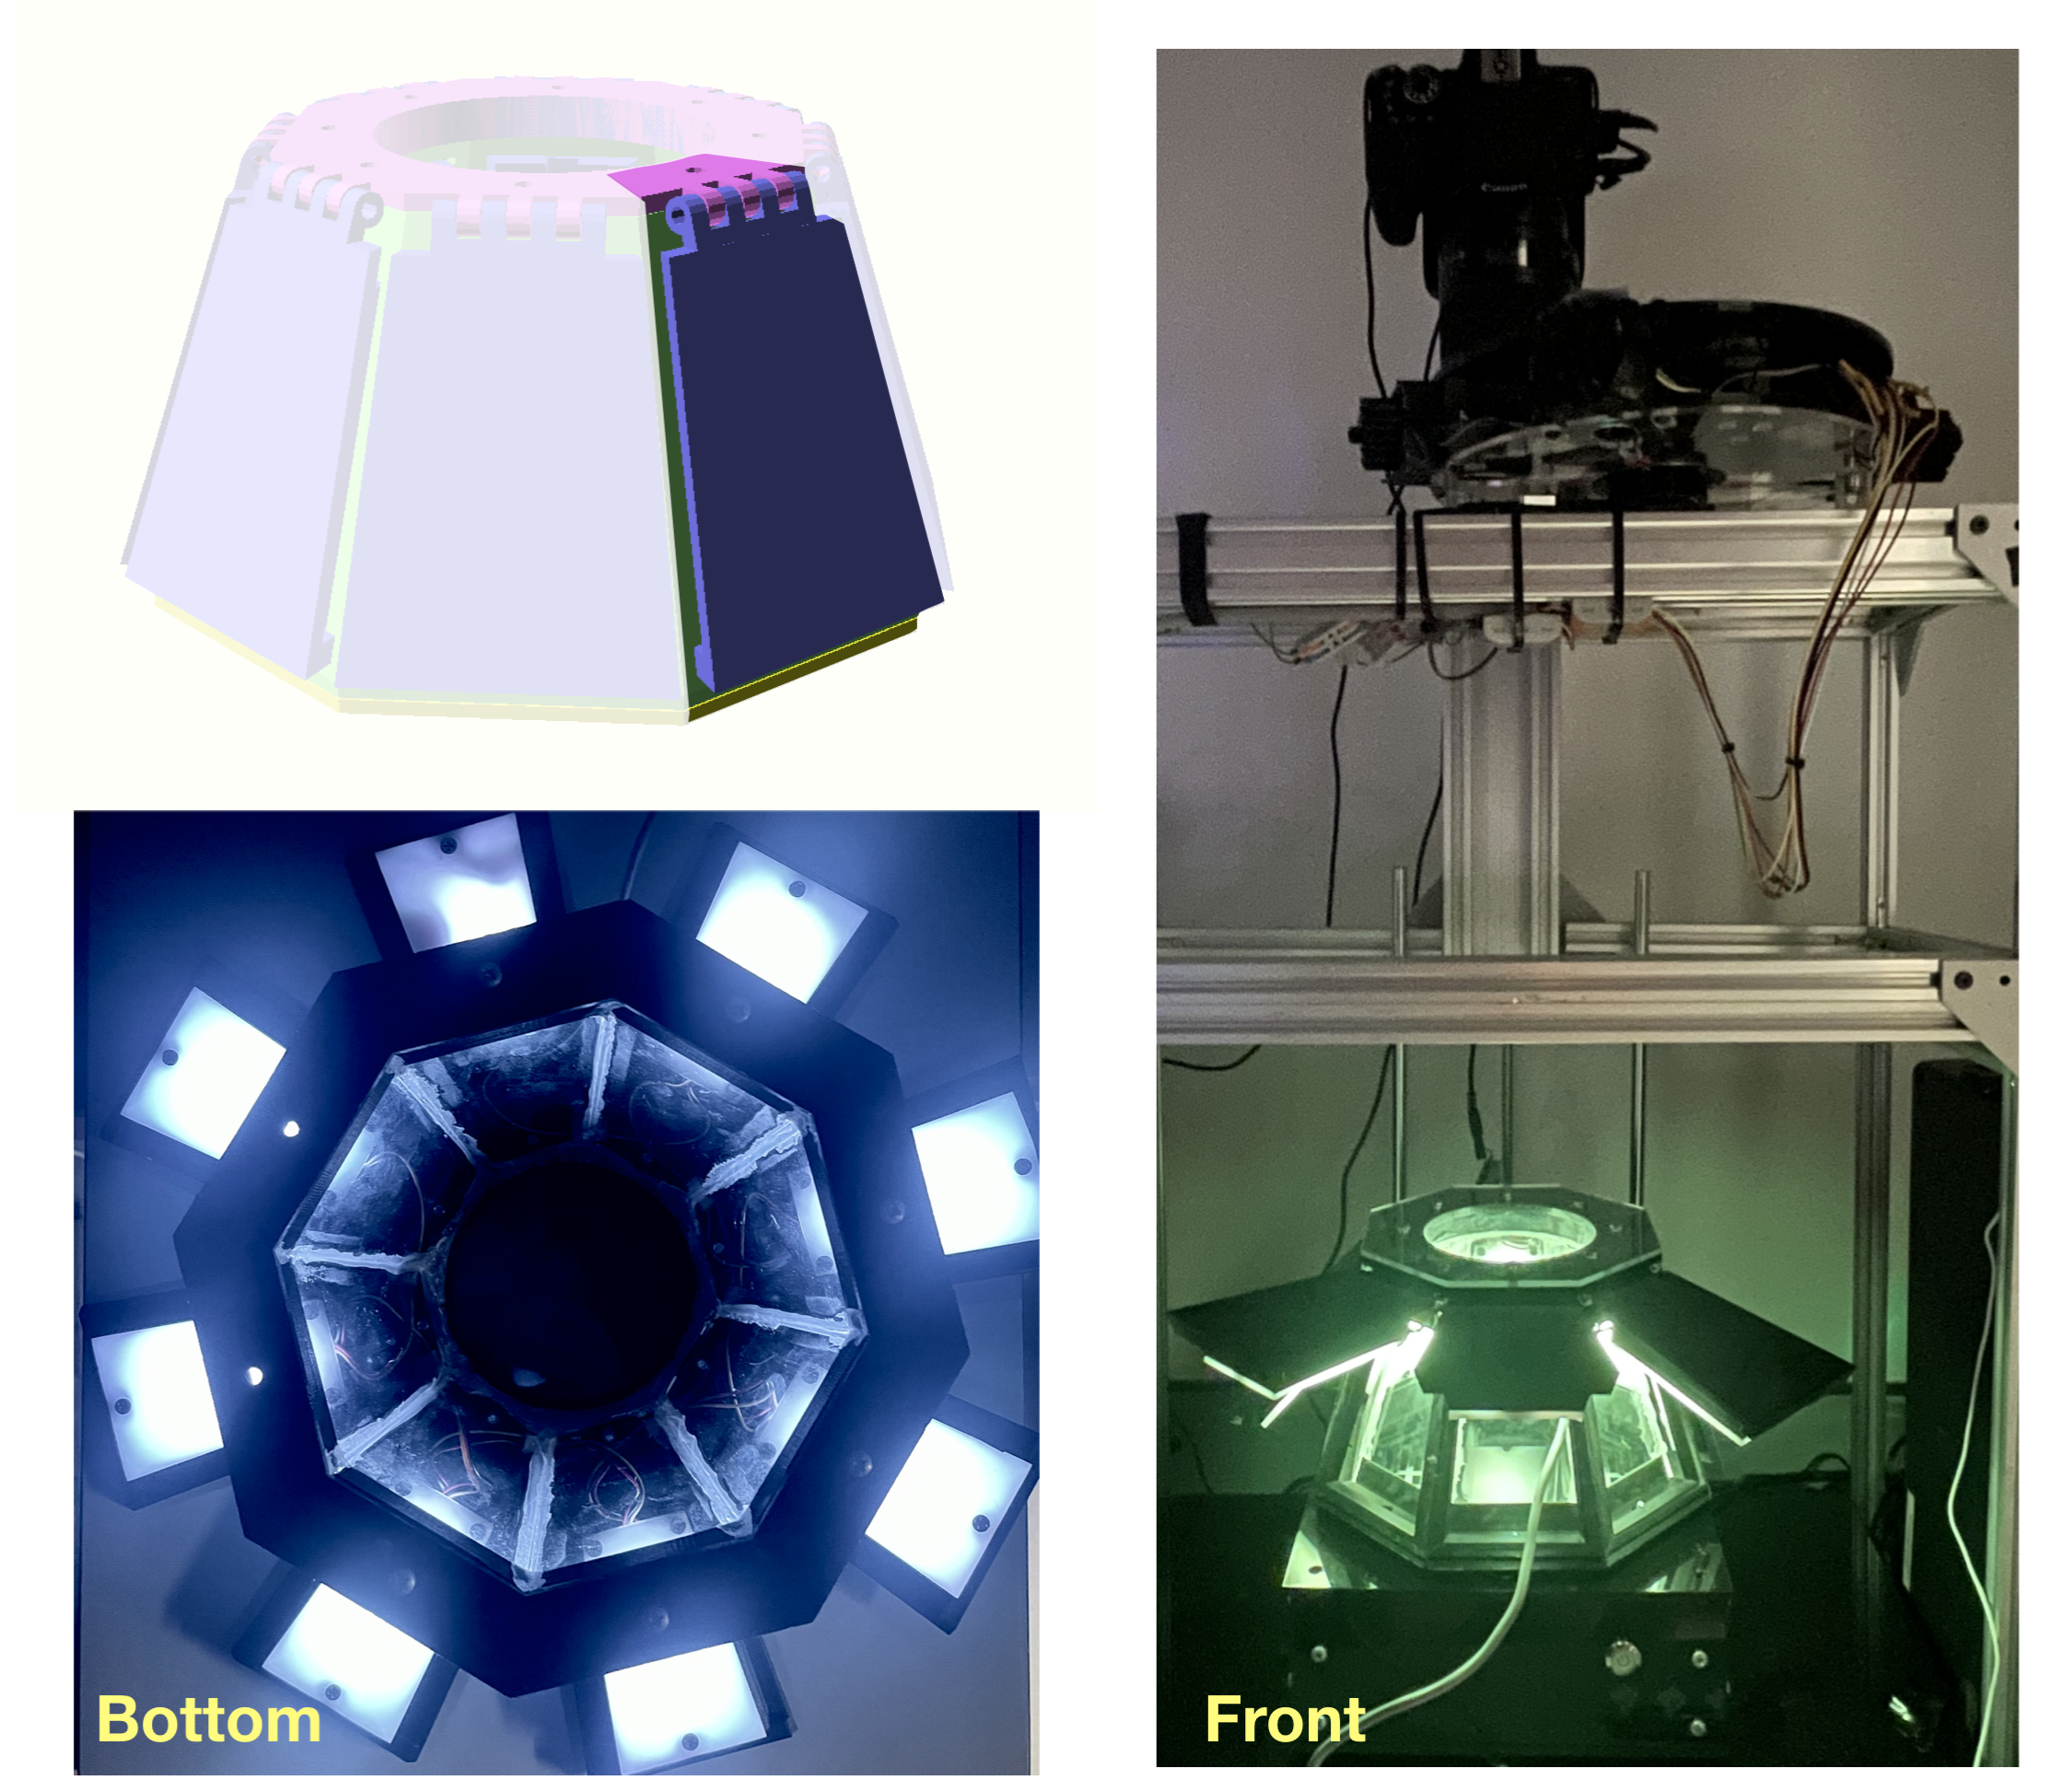
We use an 8-segment addressable LED strip with 48 light points in total (6 LED’s x 8 segments) directed towards the sample with different incident light angles in a diffused manner via a semi-transparent acrylic sheet.
Step 1: 3D Print segment
- Each segment is composed of the following parts:
Download STL/incubator_illuminator_hinge.stl
Download STL/incubator_illuminator_support.stl
Download STL/incubator_illuminator_base.stl
- Assemble each segment as shown below:
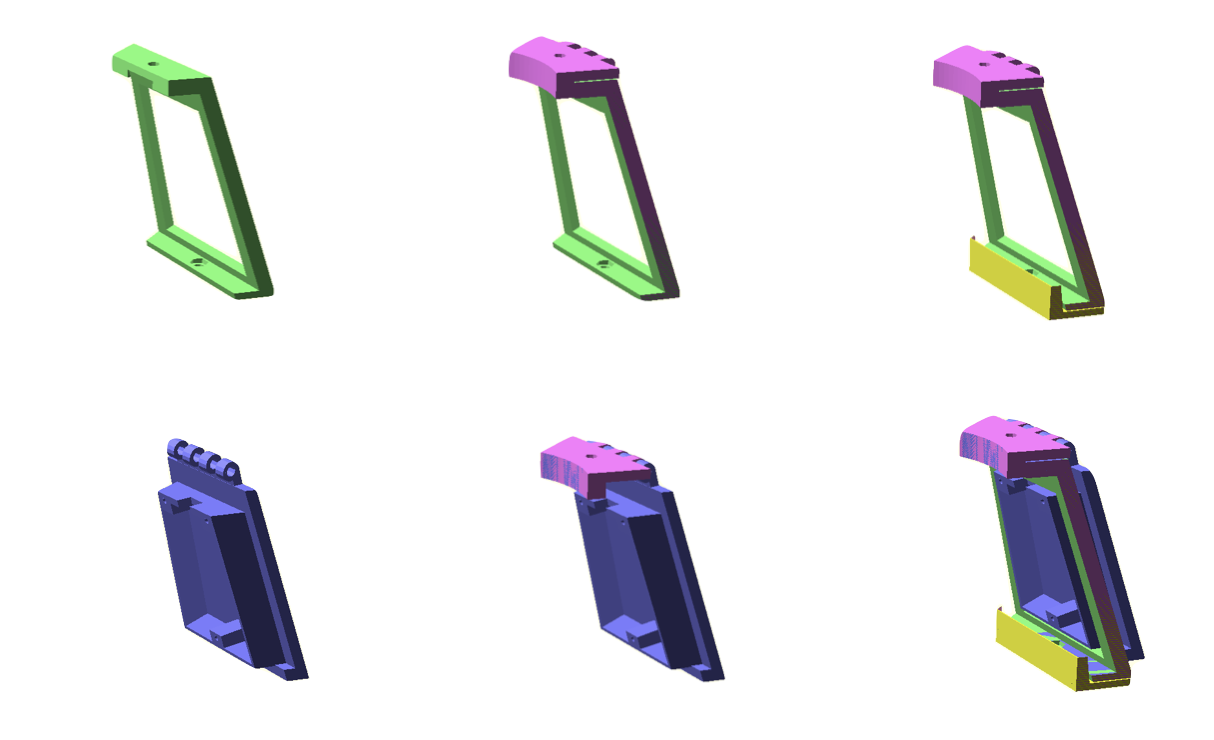
- Attach each LED segment into the corresponding 3D-printed segment using silicon glue.
Step 2: Install addressable LEDs
-
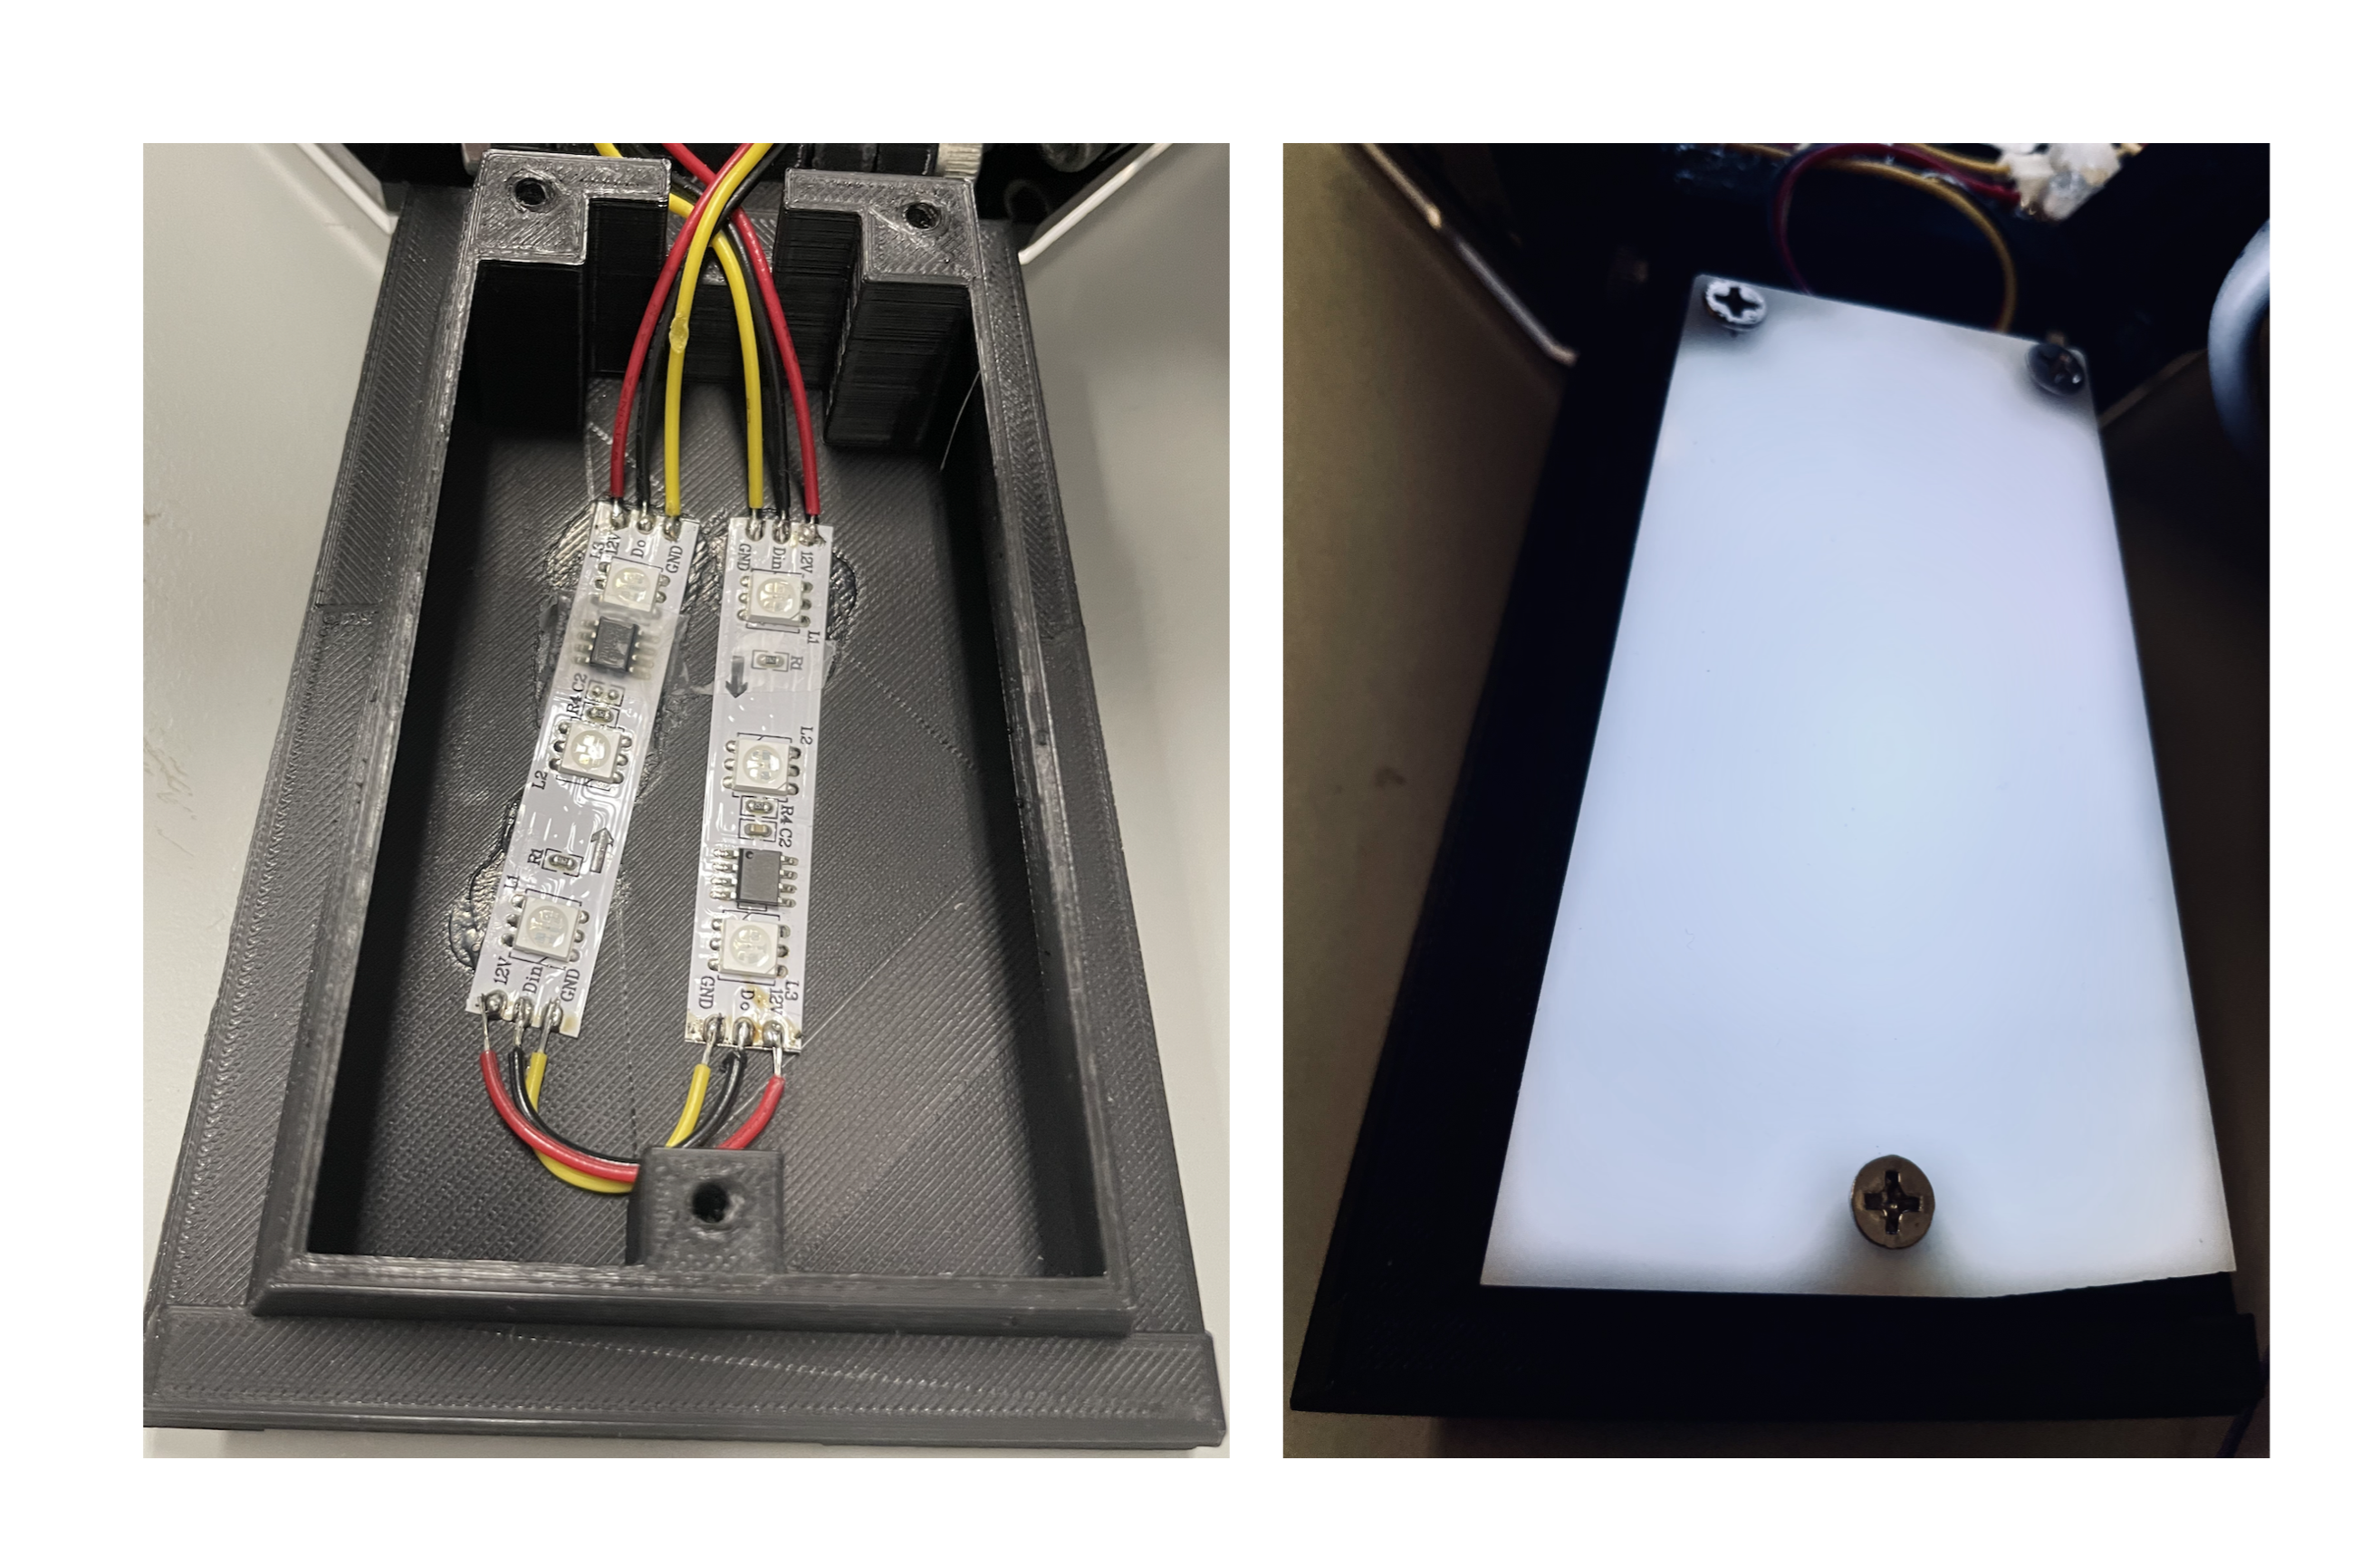
Cut the 60leds/m 12v ws2812b led strip in 6-LED segments (8 segments, 48 light points in total) with a scissors in the right place (the proper places to cut the strip are marked).
-
LED strips come with connectors at the end of each segment. After cutting into segments, now solder cables to connect segments of the LED strip in serial. Instructions to solder LED strips can be found here.
Note
Make sure that the arrow direction in the strip always points towards the flow of the current. In order to solder the cables to the strip we recommend first to apply a solder point in the strip copper terminal, then a solder point in the cable and finally solder it together by applying only heat.
- Cut the light difuser using semi-transparent acrylic sheet and screw to the 3D-printed segment.
Step 3: 3D Print incubator case
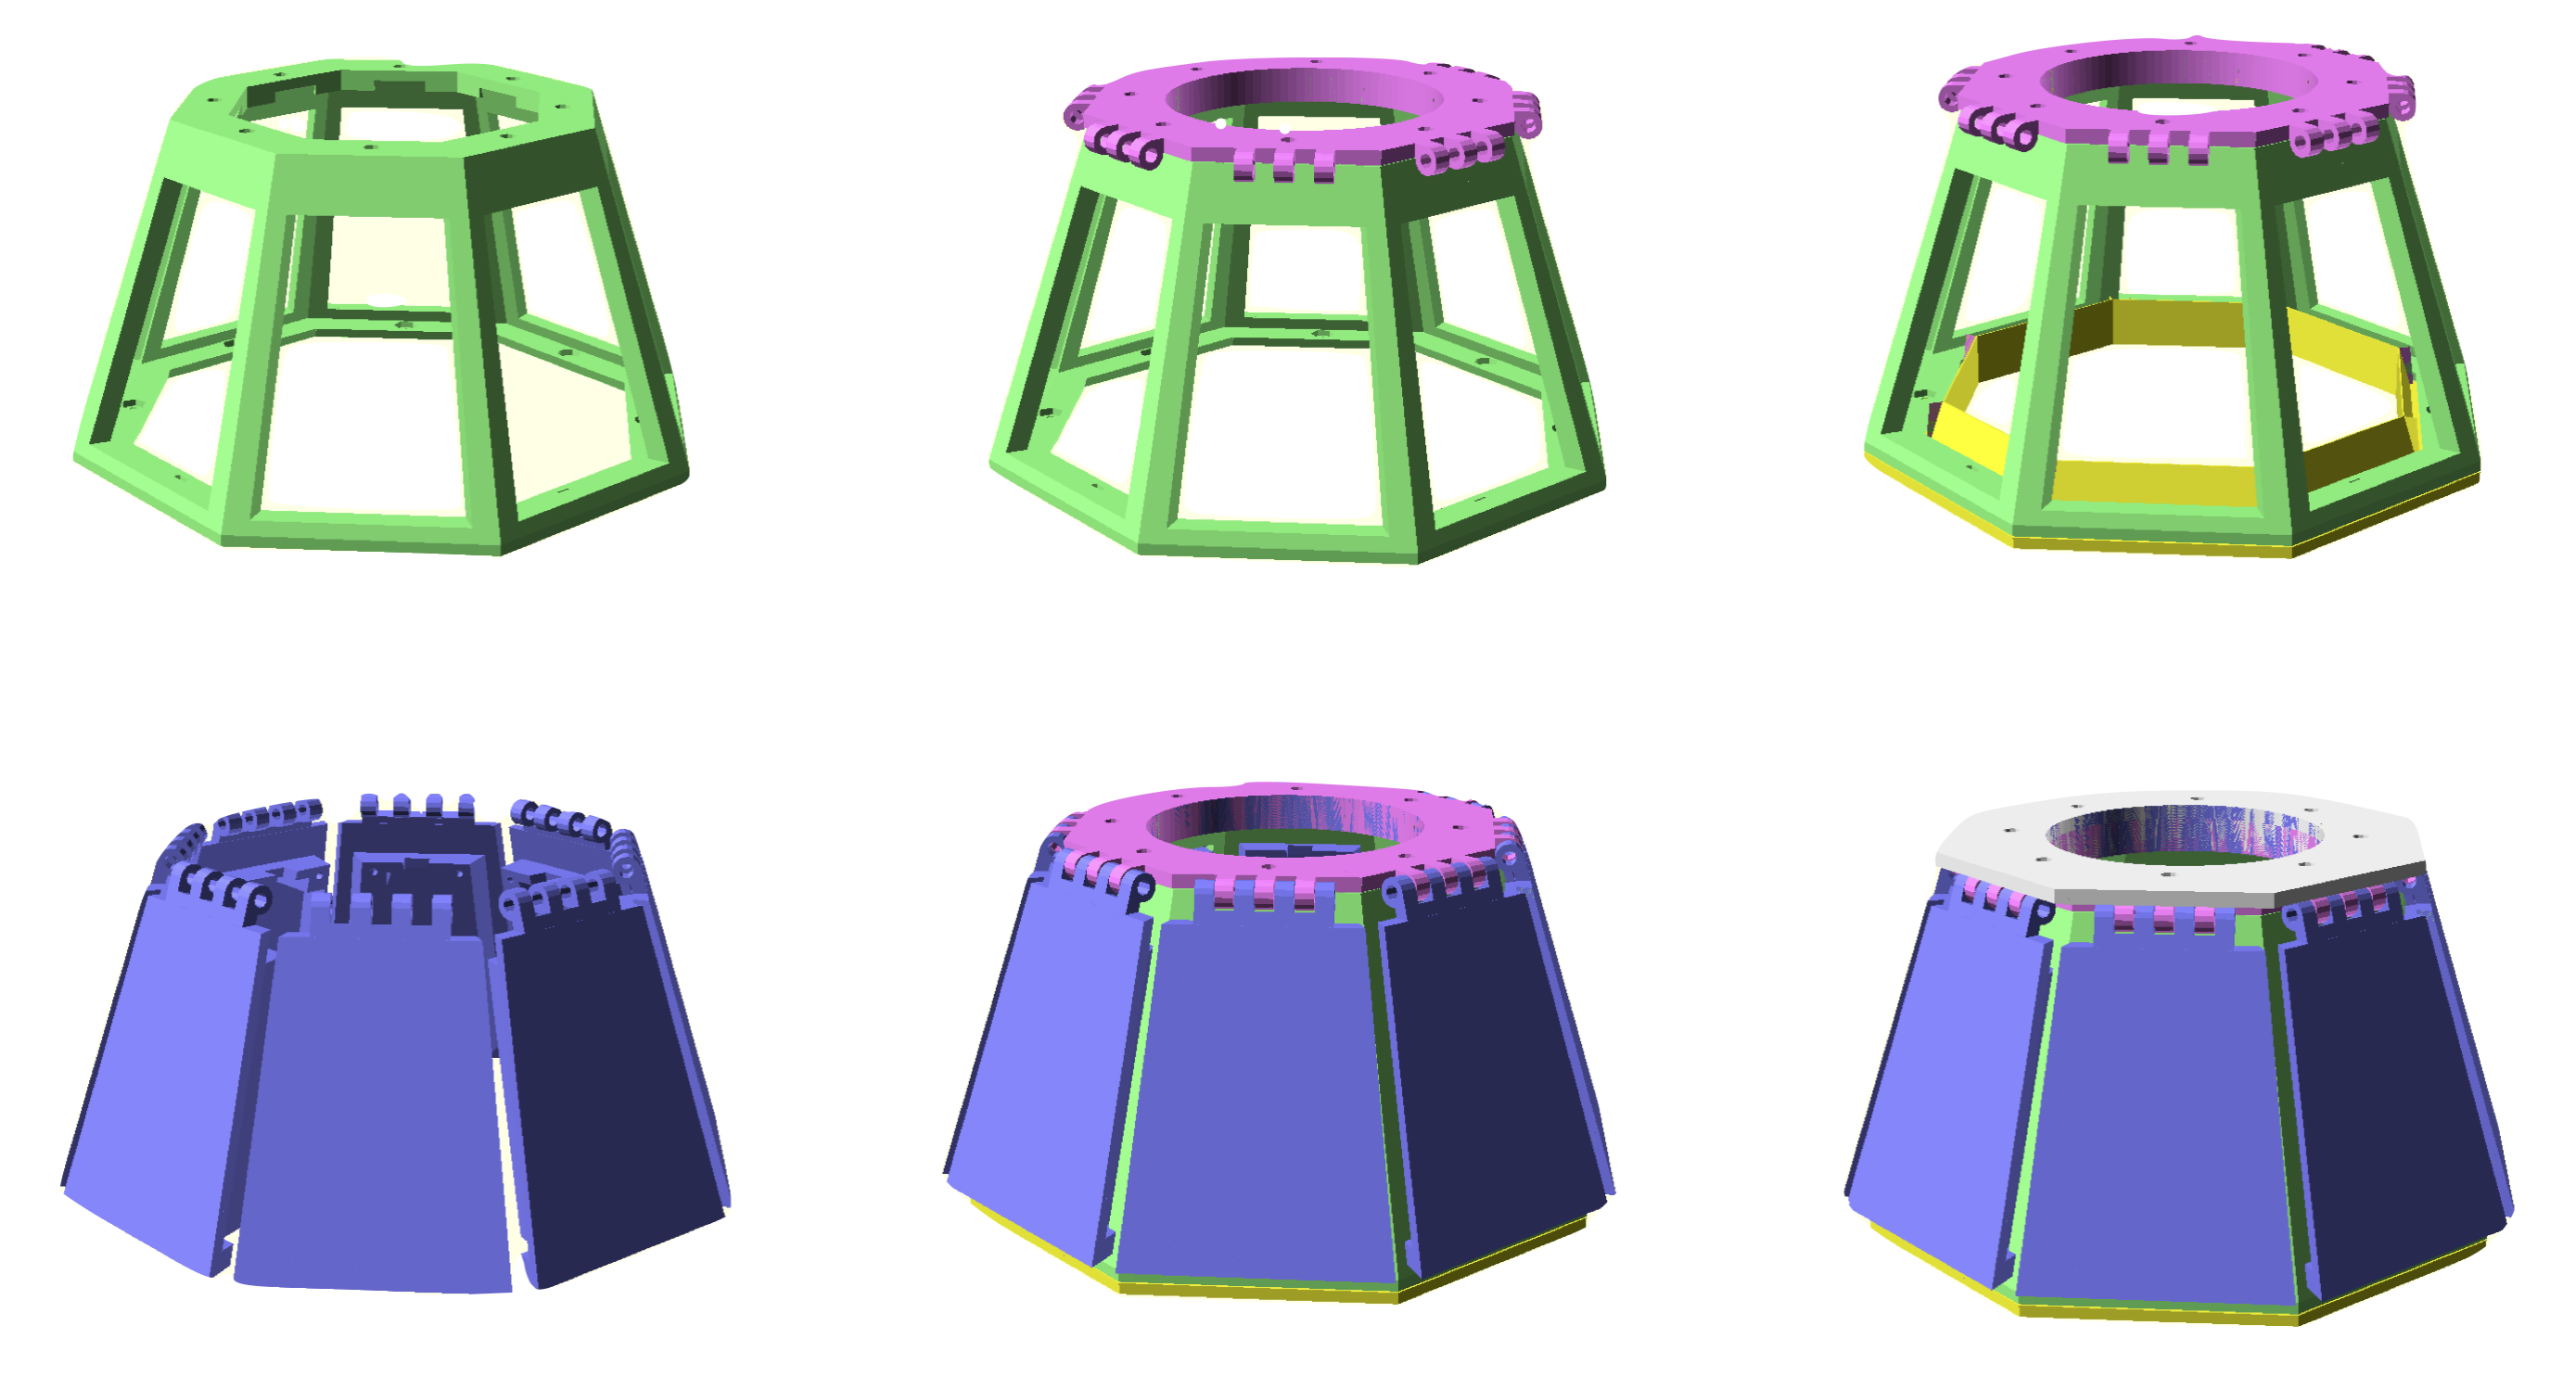
- To hold each segment and direct its light towards the sample we use a 3D-printed frame. This structure allows us to control the incident light angle of each segment and diffuse it to the sample via a semi-transparent acrylic sheet.
-
The incubator case is composed of three parts: the frame (in green), a base (in yellow), and a hinge (in purple) that holds each segment using 5" Hexagonal M8 Bolts, Nuts and Washers.
-
Cut an hexagonal shape in 5mm clear acrylic and screw to the top of the incubator case:
Step 4: Connect LED strip to Arduino
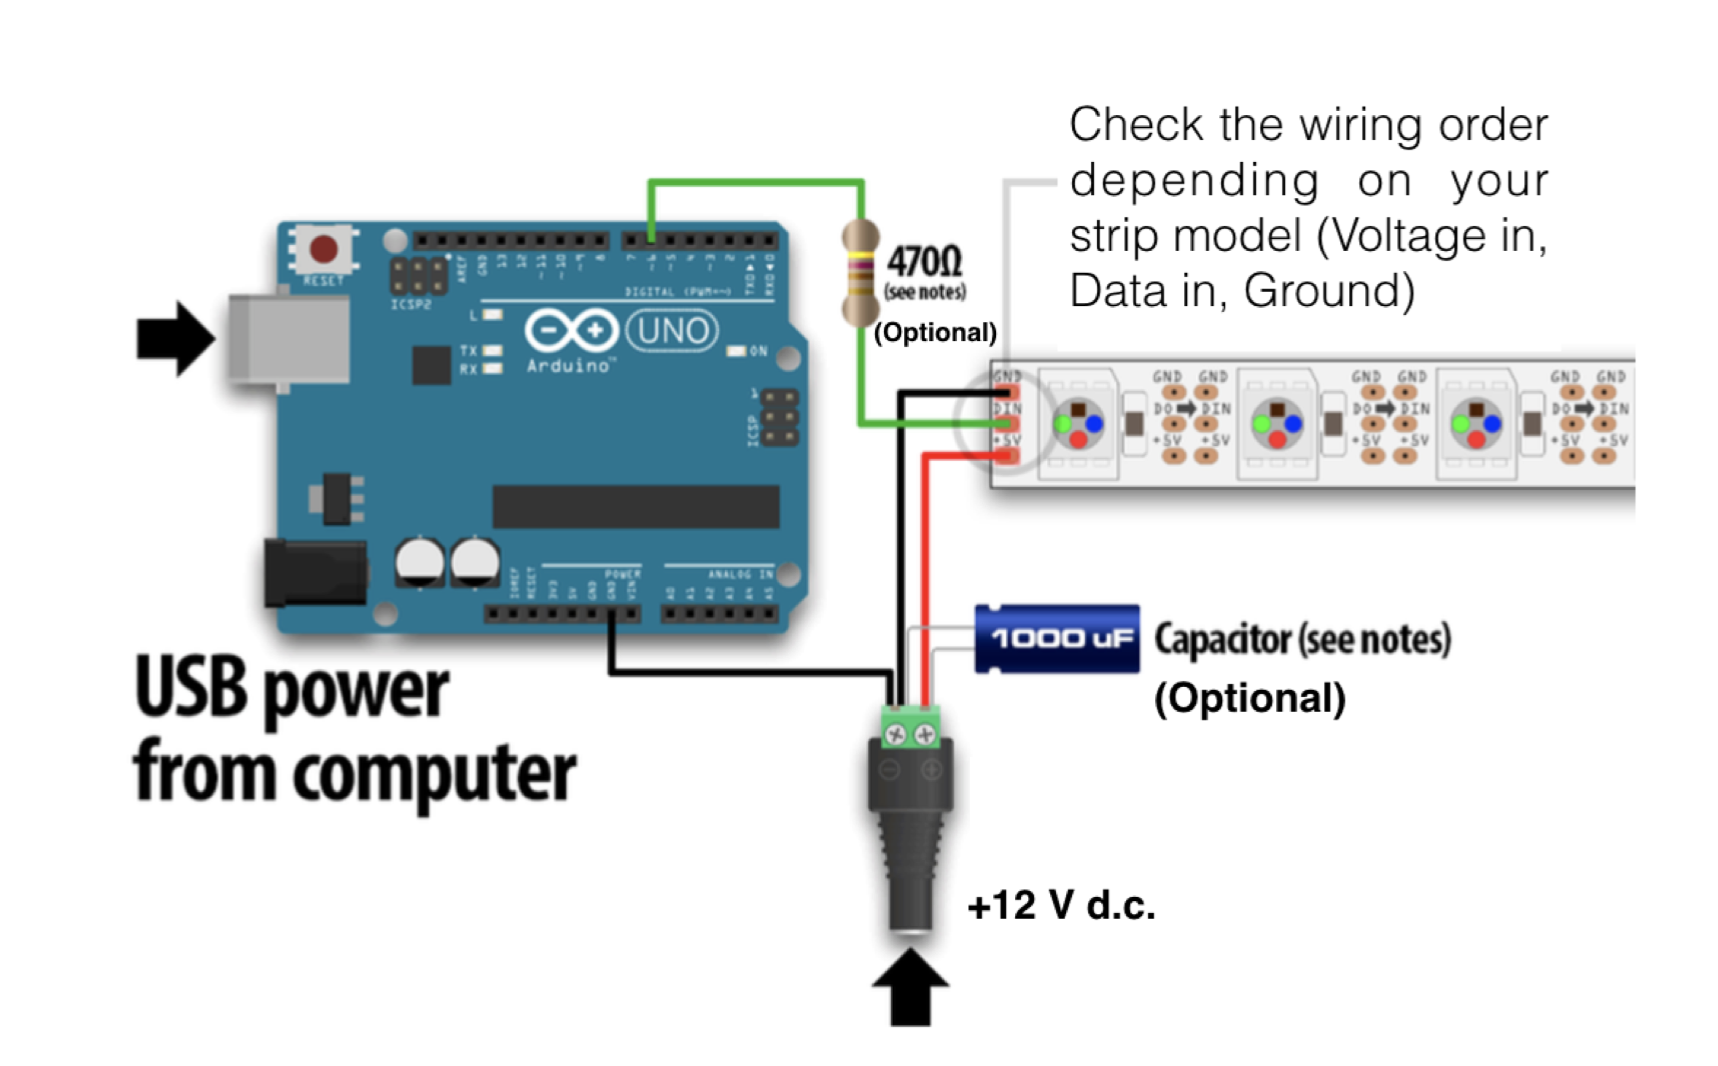
- We use a Arduino Mega2560 + Shield to control LEDs using FastLED Arduino library This allows us to define RGB and alpha characteristics of the light in a customizable way for each of the 8 segments according to the user’s preferences using serial communication through Python scripting between the GUI and the Arduino controller.
Note
Independently of the voltage input of your led strip (+5V, +12V) you will need an external voltage supply in order to supply enough power to the LEDs. Check carefully the order of the +12 V, Ground and Data wires before plugging the strip to the voltage supply.